
Part 1: Setting up a Shopify Store
Unlike most of the people is this business; I’m a pen and paper type of guy. I had a Walkman for years after the iPod came out. I’m not at all fluent in the language of Emoji. So when the podcast I was working on moved out of the ‘fun and friends in the basement’ stage, and into the stage where selling merchandise online was a possibility, I was more than a little nervous about setting up our online store. Fortunately, the three premier names in building an eCommece store – Shopify, Bigcommerce and Volusion – all had free two-week trials available. So, I decided to jump into all three to see which one makes the most sense to the guy who prefers a carefully curated collection of vinyl albums, to an expansive library of MP3 files. Welcome to part one of my four part series, How to Succeed in eCommerce Without Really Trying. This is setting up a Shopify store.
(Click photo to enlarge)
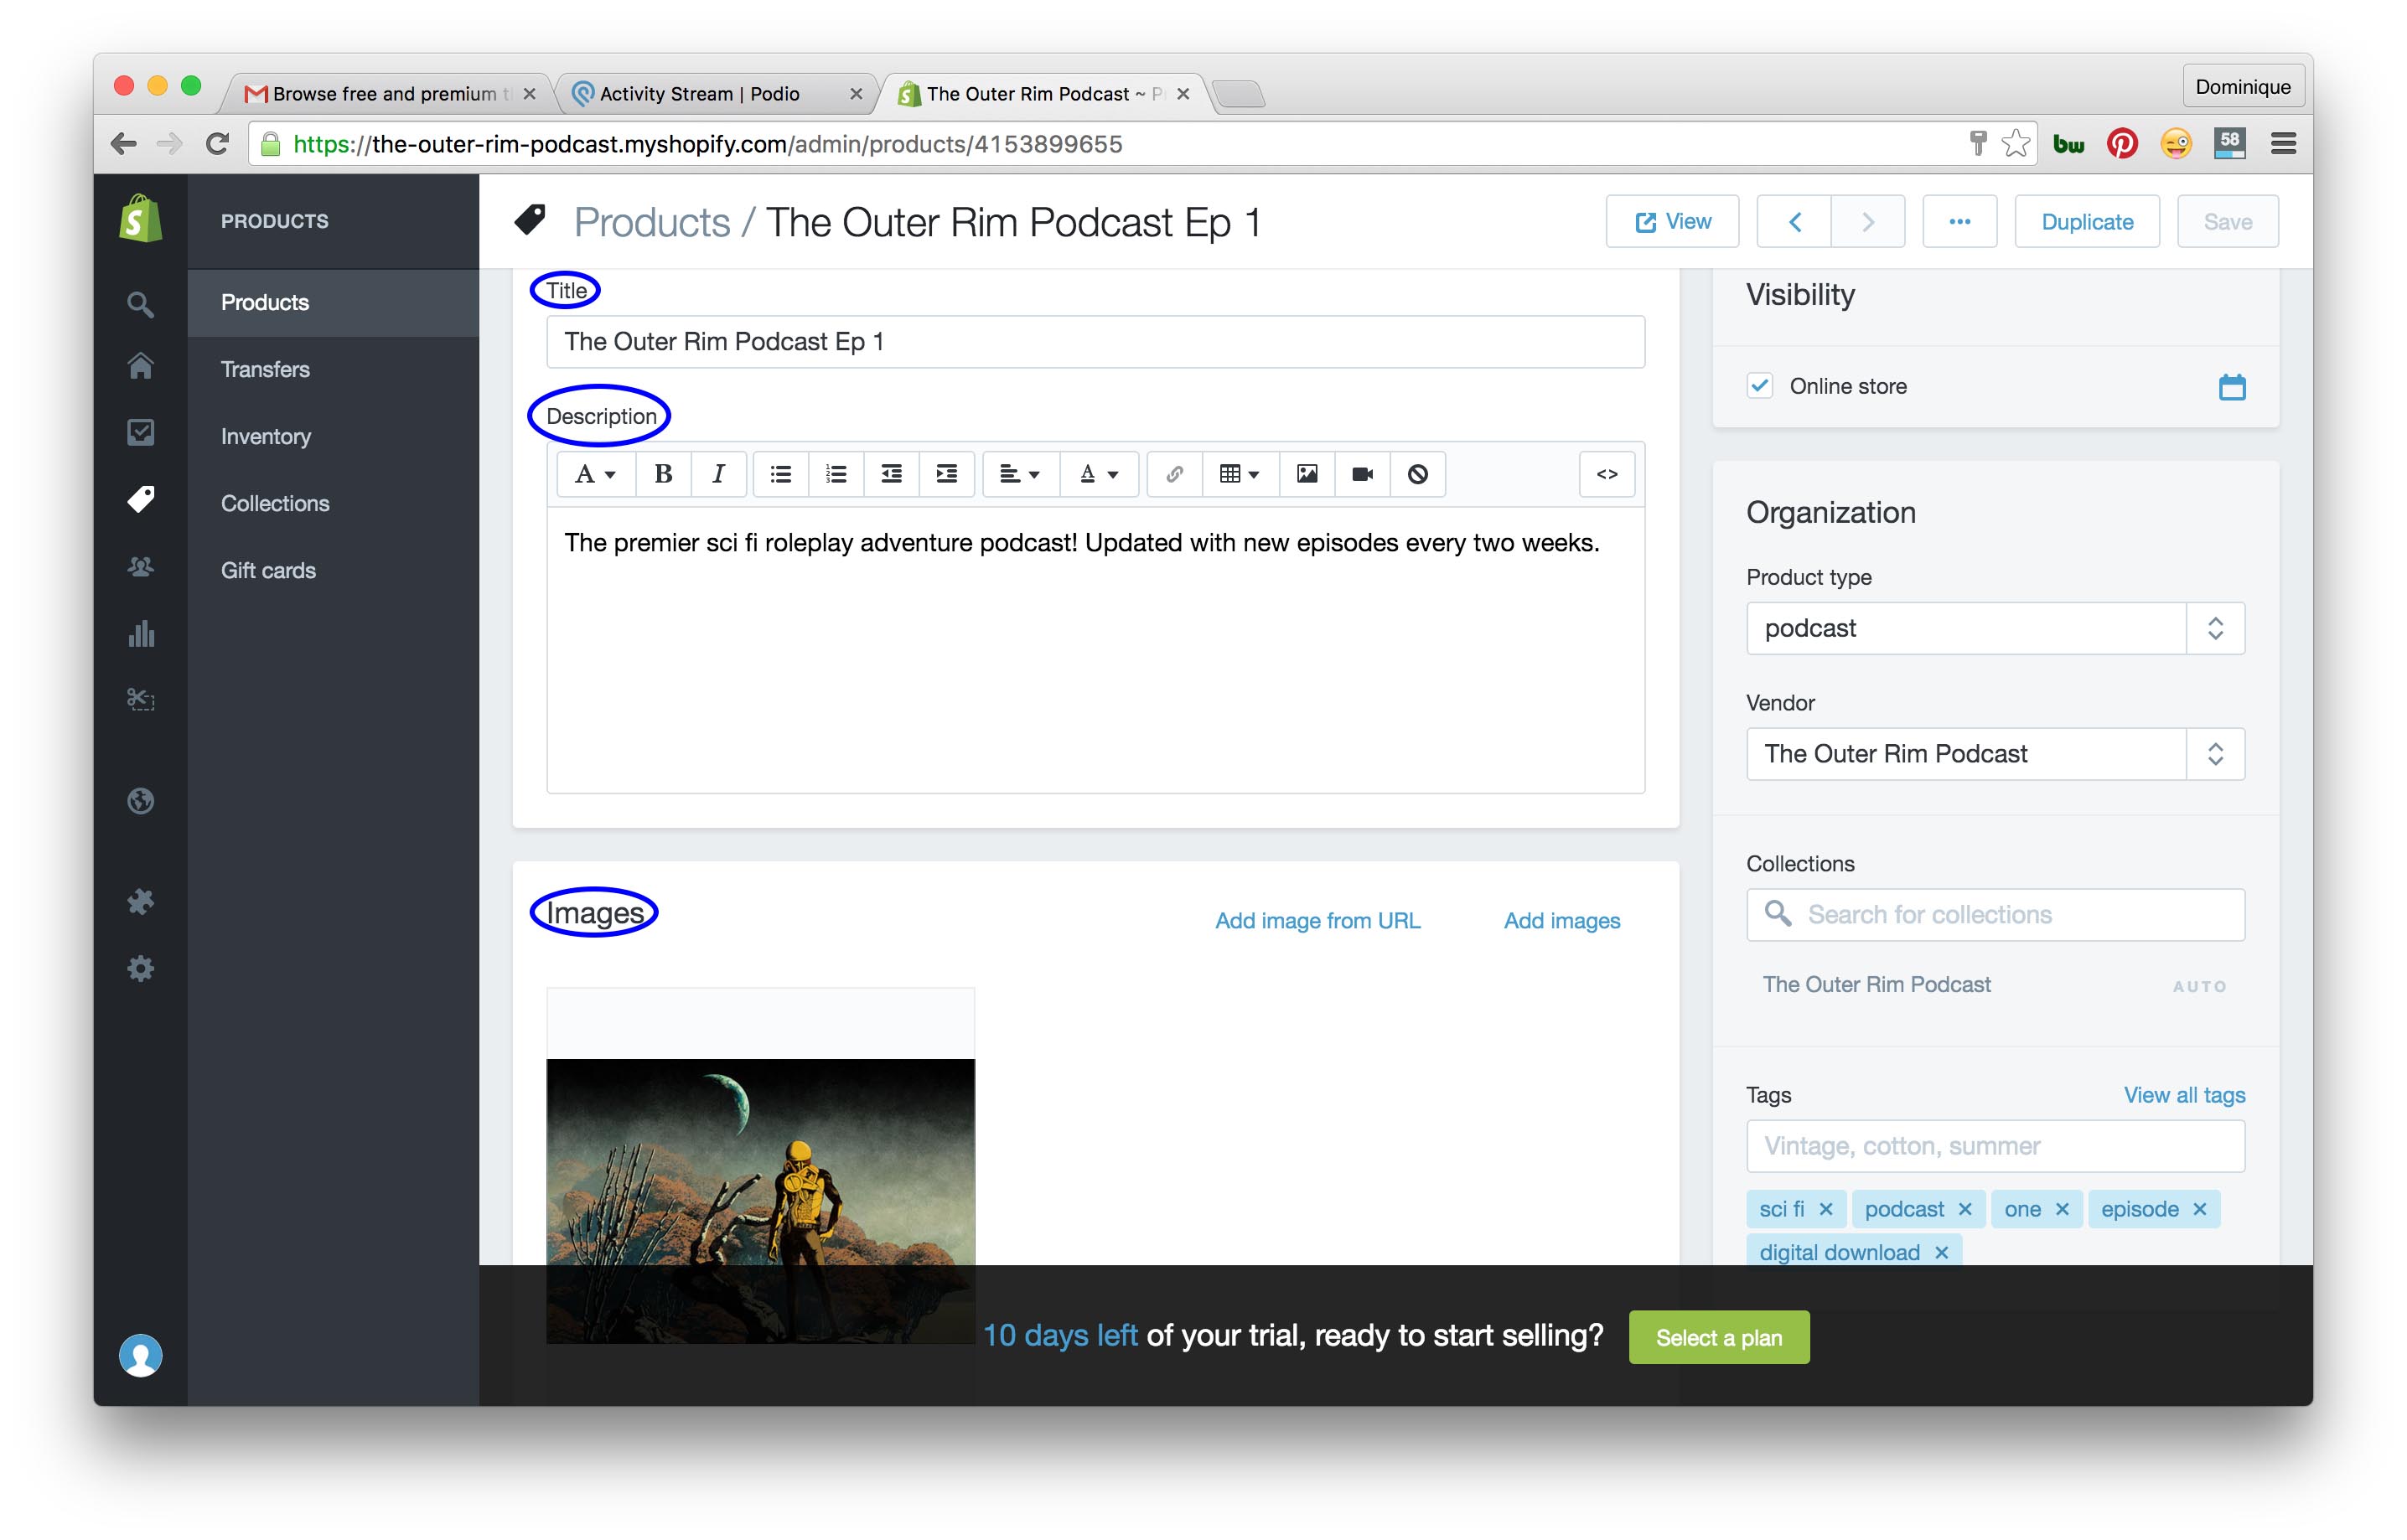
Adding Products
The first thing Shopify is going to prompt you to do is add some products. This is the fun part, and Shopify makes it easy to do.
- Select the products menu on your dashboard
- Click the blue add product button on the top left.
- Fill out the product name and product description in the clearly marked boxes.
Product images can be dragged and dropped into the box under the images heading. There is even a little box at the bottom of the products page that shows you how the link to your page will look in a search engine, given the information you’ve provided. However, it does start to get hairy for the newly initiated and perpetually nervous when the products page starts to ask you for inventory, shipping and tax code information. How am I supposed to know? This is the first page I’m exploring! But fear not, you can skip that stuff for now, and I’ll explain more about it later. For now let’s go on to…
Adding a Theme
Once you’ve added a few products you’ll probably get the urge to see what the work you’ve done looks like. But if you want to preview the front end of your store (that’s lingo for: see what it’s going to look like online) you’ll need to pick a theme. Shopify has the most theme’s to choose from of any of our three eCommerce platforms. 155 options in total, 26 of which are free. The rest cost somewhere between $100 and $200. I’d start with a free one. This is going to allow you to preview your front end, and see how the changes you make in your dashboard affect the look of your site. To do this:
- Select online store from the dashboard
- Click view your online store in the middle of the page, or click to icon next to the Shopify logo in the top left.
To work on a lot of the little things that make up your theme:
- Choose themes in the online store menu
- Click customize theme on the top right.
Don’t worry about the theme you pick too much. You can always change it later. There is also a whole word of custom themes to explore. While you’re creating your web store’s look, you’ll also want to give equal attention to your web store’s content, and that means…
Adding Copy
Copy is the writing that’s going to fill up the pages of your web store. You’ve already done some copy writing when you wrote your product descriptions. But you still need to fill in the pages that every website has: a homepage, an about us page, and a contact us page. I’d also recommend writing some copy for the blog feature that comes with your Shopify theme. An active blog is going to help your web store’s SEO down the road, but that’s another story for another time. To edit the pages of your web store:
- Click online store
- Select pages from the pop up menu.
A list of the pages on your web site will appear. You can edit these pages in much the same way as the product pages, title at the top, content of the page in the text box below. You can add a contact us page using this pages menu, but many Shopify themes include a contact us section in the footer of your web store’s pages. You can edit this information by using the customize theme button we discussed in the last section. While exploring that footer, you may find some buttons for…
(Click photo to enlarge)
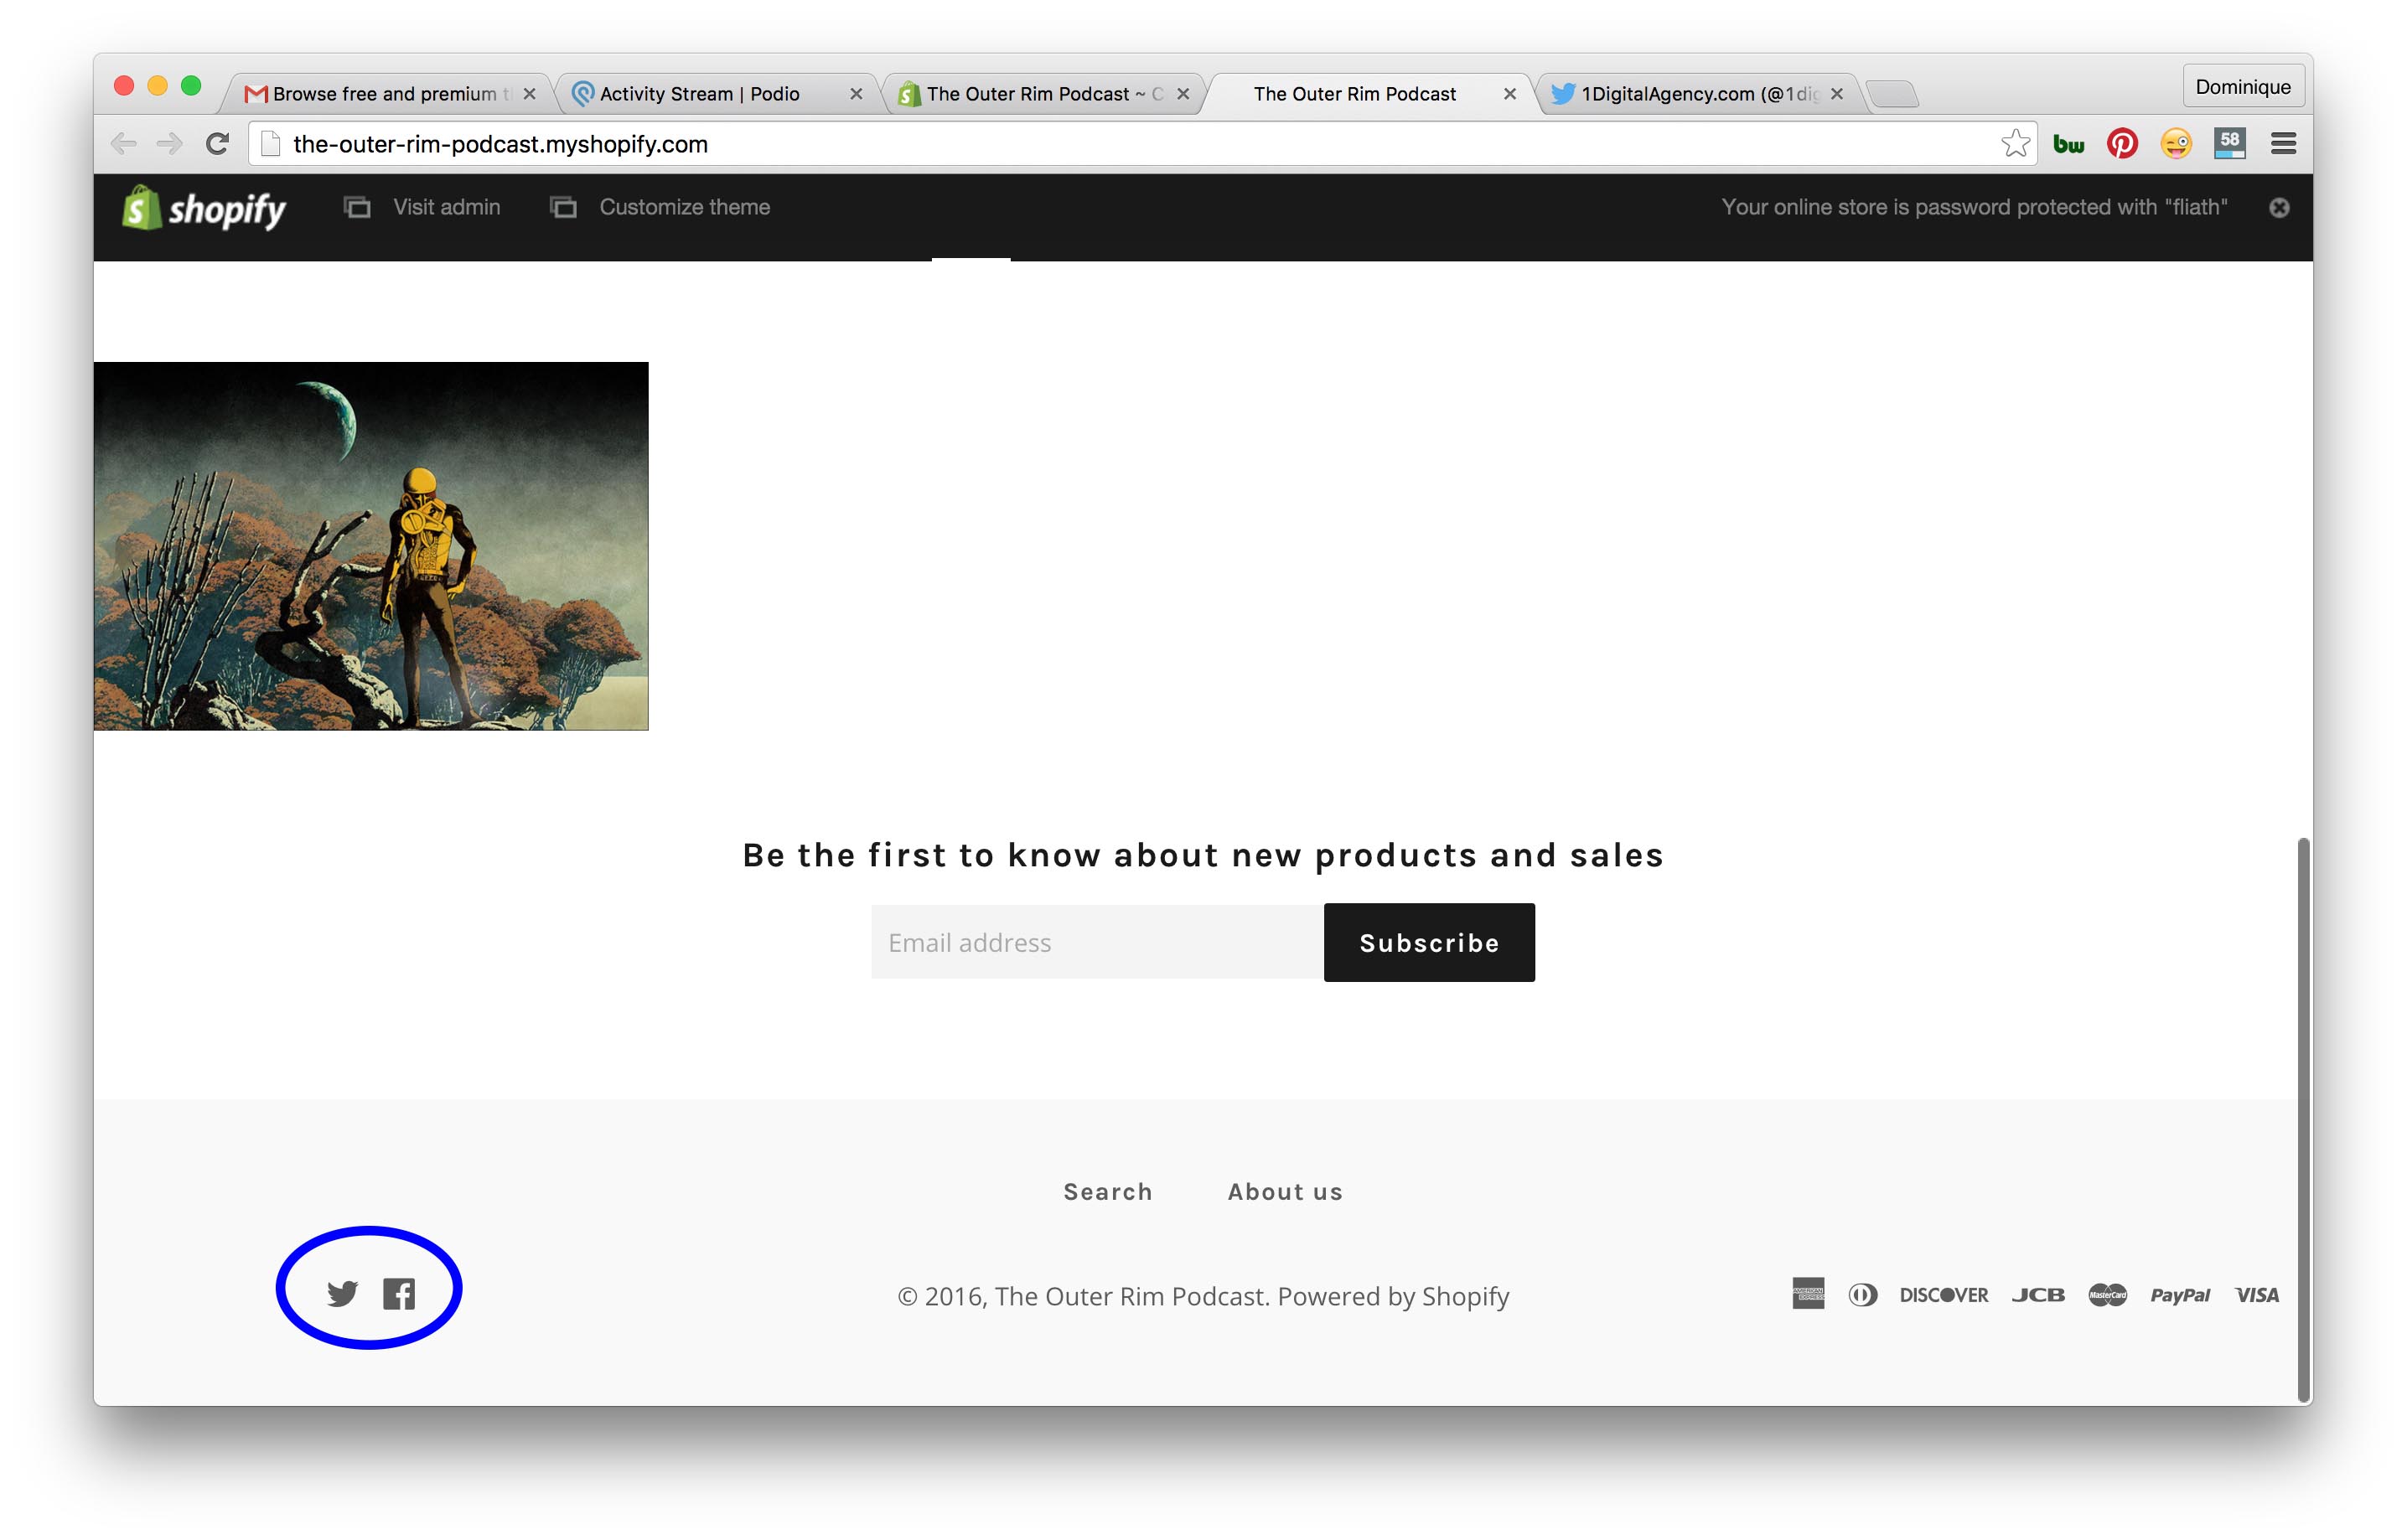
Social Media Integration
Social media is an important part of engaging your customers. Your social media pages create more roads that lead back to your store. Integrating your social media pages with your Shopify web store is as simple as copy and paste.
- Go to the customize theme menu
- Choose the social media option
Once on the social media page, copy the relevant links into the boxes for Facebook, Twitter, Pinterest, and others. These could be your personal pages, or pages dedicated to your store. Whichever you think will garner more attention for your products. If you don’t have one of the relevant pages, let’s say it’s Tumblr; Shopify may have a link already filled leading back to their Tumblr page. Simply delete the link and the button for Tumblr will disappear.
Setting Up Payments
Ok, it’s been fun, but enough messing around with the aesthetics. It’s time to make the doughnuts. Taking payments is going to be one of the most nerve-wracking things about setting up your store. It’s a crazy world out there, and you want to make sure that the money is going to change hands between you and your customers reliably and securely. Shopify stores set up in the US and Canada come with Shopify Payments, which accepts payments from all major credit cards. Shopify will take a percentage off of any credit card transactions made through your store to cover the cost of this service. All three of our eCommerce services charge these fees, and they change slightly based on the tier of payment plan you end up selecting when you launch your store; more on this later. In order to set up your Shopify Payments account:
- Select settings from your dashboard
- Click payments from the pop up menu
- Click the blue button that says complete Shopify Payments account set up.
That button will take you to a form that you will fill out with things like personal information, business information and banking information. Shopify stores also come with the ability to accept payments through PayPal. When your store is launched, the email associated with your store will be linked to a PayPal Express (link)Checkout account. Once you receive your first payment through PayPal, they will send you an email that contains the link and instructions that will allow you to complete your account, and claim your payment. If neither of these methods strike your fancy, Shopify offers a wealth of downloadable apps to deal with payment, including apps that specialize in recurring payments, donations, and even a Shopify designed point of sale system. Once you receive a payment, you’ll need to hold up your end of the bargain, so we’re going to have to work on…
Setting Up Shipping
To get to the shipping page:
- Go to the settings menu
- Select shipping
Shopify starts you with some standard shipping rates, which are based on weight, for domestic shipping. These can be easily changed, and you can add free shipping for orders over a certain dollar amount. Shopify also sets you up with a basic international shipping rate. To choose what countries are covered under your international shipping purview:
- Click edit zone, next to the rest of the world heading
- Choose the countries you’d like to include, at the rates you’d like to charge
The shipping page also gives you the option to choose which type of label printer Shopify should integrate with when printing your shipping labels. There also a range of options for specifying what the dimensions of your shipping boxes will be. This helps Shopify to calculate shipping costs. If you don’t want to deal with boxes, or labels, or shipping in general, Shopify provides options to connect you with a fulfillment service. A fulfillment service is a third party warehouse that stores and ships your items for you. With shipping set up, and the basic pillars of our web store taken care of, we can start thinking about…
(Click photo to enlarge)
Launching The Store
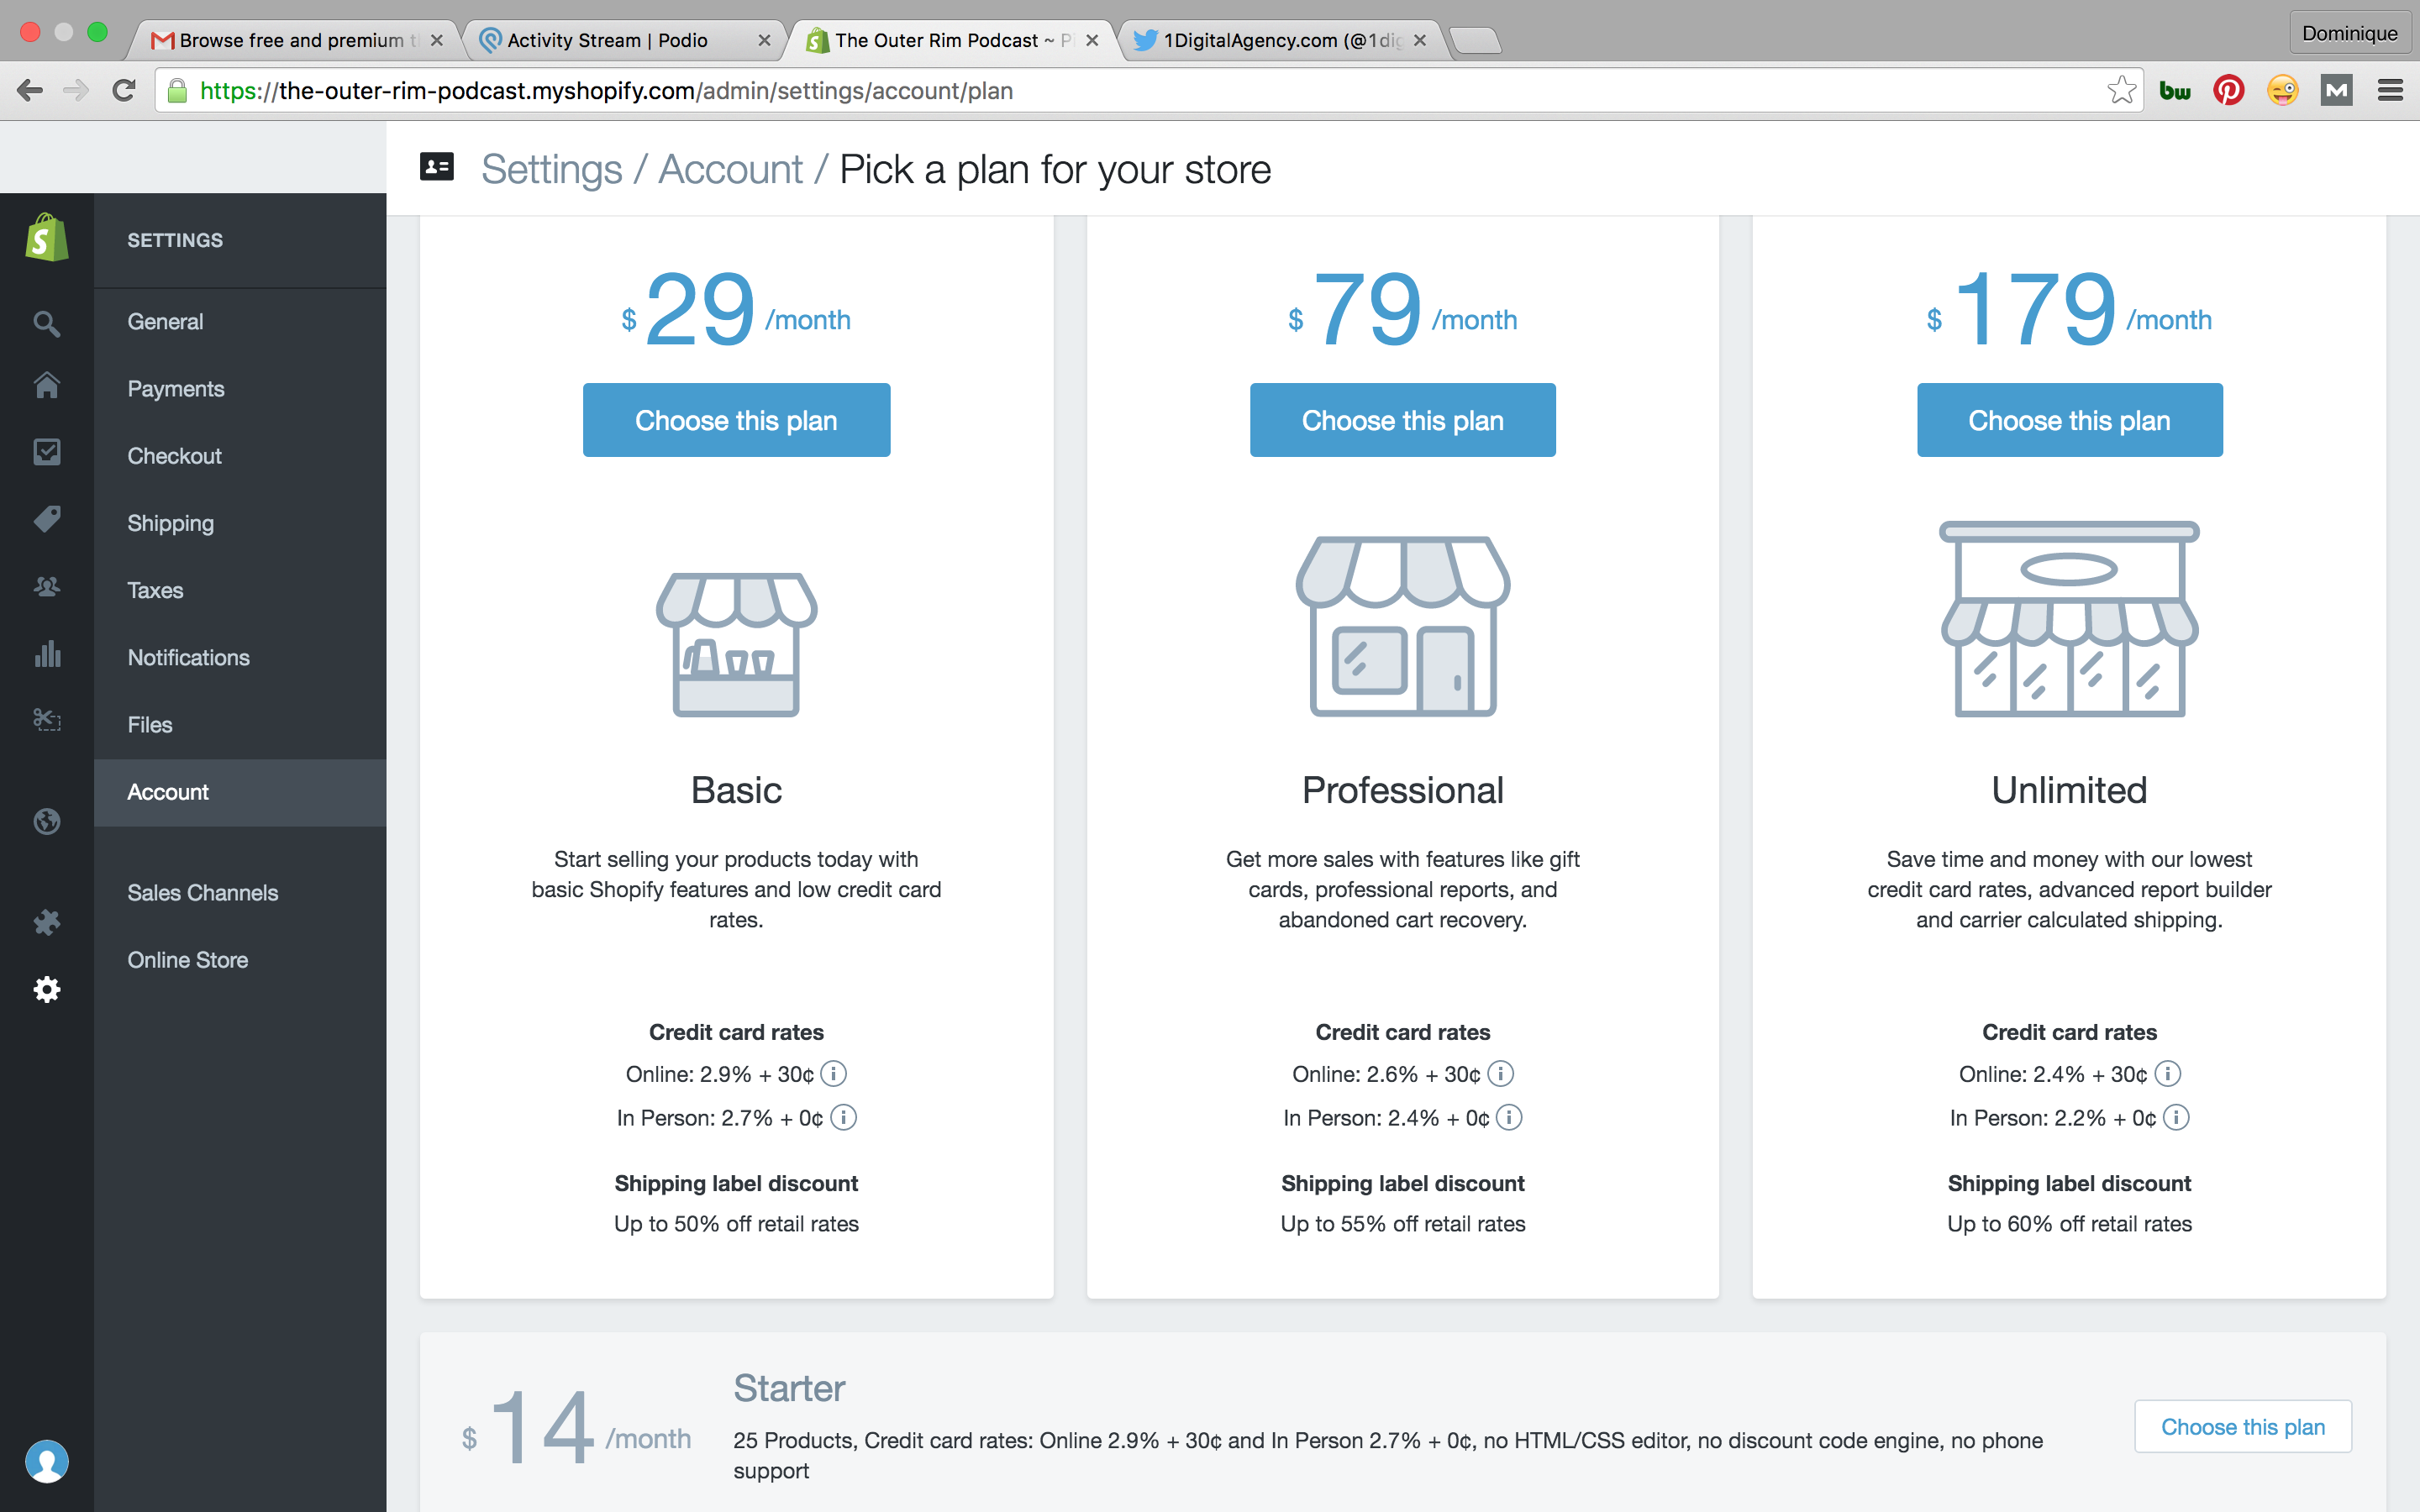
The first thing to do before you’re finished setting up a Shopify store is purchase a domain name. You can do this by:
- Go to the online store menu
- Select domains
- Click the blue button on the top that says buy new domain
A box will appear that allows you to search for a domain name that is available for purchase. If your preferred domain isn’t available in .com you have the option to look for it under .net, or .info, as well as a few others. Shopify will acquire an available domain for you at $13 a year. The next thing to do before your store is ready to launch is choose a monthly payment plan. Shopify offers four plans to choose from. These plans range from $14 per month for the Starter Plan, to $179 per month for the Unlimited Plan. At each increasing tier a bit more functionality is added, like abandoned car recovery at the Professional level, or carrier calculated shipping at the Unlimited level. Once you decide on a plan that fits your store it will be ready for launch, but don’t commit just yet! We still have two more eCommerce platforms to explore.
Overall Impressions on Shopify
Of all the eCommerce platforms I tried, Shopify had the least barrier of entry, which makes it really appealing for the eCommerce uninitiated. Its dashboard is instantly readable. If you have any experience using WordPress, another popular web design platform, you should have no trouble acclimatizing. With the most theme choices, I found Shopify’s aesthetics the most fun to play around with. Images are easy to drag and drop, and I had a lot fun tweaking all the customization options. It’s also the cheapest. The $14 per month starter plan is the least expensive plan on offer from each of our three platforms. I could see how this low dollar commitment could be really enticing to someone who’s not sure how far he or she want to dip his or her toes into the eCommerce world. But Shopify’s ease of entry may come around to bite the eCommerce newbie in the long term. That starter plan, which is so cheap, does not include pretty basic services like HTML/CSS editor, or phone support. And the higher tier plans don’t add anywhere near the level of functionality that the other two platforms include at their more expensive levels. Instead, Shopify makes that functionality available in the form of apps, many of which charge extra monthly fees. When it comes right down to it, Shopify might be attractive to an eCommerce newbie, because it allows you to get your store going quickly and easily. However, if you have patience to hang in there, and learn a little bit more about how your web store works, you may find a better long term value in Bigcommerce or Volusion.
So, that’s my rundown on setting up a Shopify store. Make sure to keep your eyes peeled for my next entry of How to Succeed in eCommerce Without Really Trying, when I take the plunge into Bigcommerce.
If you need any help customizing your Shopify store, designing your first template or developing a few extra features, give us a call.
Related Posts in This Series
- How to Succeed in eCommerce Without Really Trying: Volusion
- How To Succeed in eCommerce Without Really Trying: BigCommerce
- BigCommerce vs Volusion vs Shopify: The Full Comparison Review
Welcome to Part 1: Essential Shopify Setup Basics
Welcome to the first installment of our comprehensive guide on launching your e-commerce venture without the usual hassle. This four-part series is designed to help you navigate the initial setup phase by focusing on specific platforms. In Part 1, we'll dive deep into the essential Shopify setup basics, perfect for entrepreneurs looking to leverage this powerful platform. If Shopify isn't your chosen solution, don't worry – you can easily jump to the relevant guide for your needs.
Choose Your Platform
- Shopify – Part 1 (You are here)
- BigCommerce – Part 2
- Volusion – Part 3
- WooCommerce & Custom Solutions – Part 4
About This Guide
This is Part 1 of 4 in our complete series covering this topic in depth.
What You'll Learn in This 4-Part Shopify Series
This article is Part 1 of a four-part series designed to walk complete beginners through everything they need to launch a successful Shopify store. Whether you have never sold anything online before or you simply want a straightforward, jargon-free guide, this series covers it all in plain language.
Here is a quick overview of what each part of the series covers:
- Part 1 (You Are Here): Setting up your Shopify store from scratch — adding your first products, choosing a theme, and getting comfortable with the dashboard.
- Part 2: Configuring shipping rates, tax settings, and inventory management so your store is ready to take real orders.
- Part 3: Customizing your storefront, writing product descriptions that sell, and setting up your domain name.
- Part 4: Launching your store, processing your first payment, and comparing Shopify against Bigcommerce and Volusion to decide which platform is right for you.
How to Get Started With Shopify Right Now
If you are following along for the first time, here is a quick recap of the essential first steps covered in this article:
- Sign up for Shopify's free two-week trial — no credit card knowledge required to explore the platform.
- Add at least one product using the dashboard's Add Product button, filling in the name, description, and a product image.
- Select a free theme from Shopify's library of 26 free options so you can preview what your storefront will look like to customers.
- Don't worry about inventory, shipping, or tax code details yet — those are covered in Part 2.
The goal of this series is simple: prove that even the most technology-averse person can build a fully functional online store without panic. Keep reading through all four parts and you will have everything you need to go from zero to your first sale.
What Comes Next: Continuing Your Shopify Journey
Now that you have a solid foundation — products added and a theme selected — there is still plenty more to learn before your Shopify store is ready to make its first sale. The remaining parts of this series walk you through everything from configuring shipping rates and tax codes to processing your first real transaction.
What the Rest of the Series Covers
- Part 2 – Payments and Checkout: How to connect a payment gateway, understand Shopify's own payment processing fees, and make sure customers can actually hand you money without hitting a dead end.
- Part 3 – Shipping, Taxes, and the Details That Trip People Up: Those inventory and tax code fields you skipped on the products page? This is where they get demystified, even for the vinyl-record crowd.
- Part 4 – Going Live and Getting Found: Choosing a custom domain, flipping your store from password-protected to public, and taking the first steps toward getting real traffic through search engines.
How Shopify Compares to Bigcommerce and Volusion
Remember, this Shopify walkthrough is just one leg of the journey. The same setup process was tested side by side on Bigcommerce and Volusion during the same free two-week trial period. If you found Shopify's 155 themes and drag-and-drop product images appealing, you may be curious whether the competing platforms keep pace — or whether they make certain steps even easier for the non-technical store owner.
Each platform has genuine strengths, and the right choice depends on the size of your catalog, how comfortable you are with customization, and how much you want to spend on a theme. By the end of all four parts, you will have enough information to make that call with confidence — no emoji fluency required.